
Why Change Your Module Banner?
The module banner is the first thing students see when they enter a module. A vibrant and relevant image can set the tone for the learning environment, making it more inviting and visually appealing. Whether it’s a course-related image, an inspiring landscape, or a motivational quote, the banner can reflect the essence of the course material and create an impactful first impression.

How to Change Your Module Banner on Brightspace:
Firstly, make sure you are in the module which you would like to change the banner.
Hover your mouse over the existing banner image until three dots appear on the right-hand side. Click on these.

Then from the drop-down menu select Change Image.

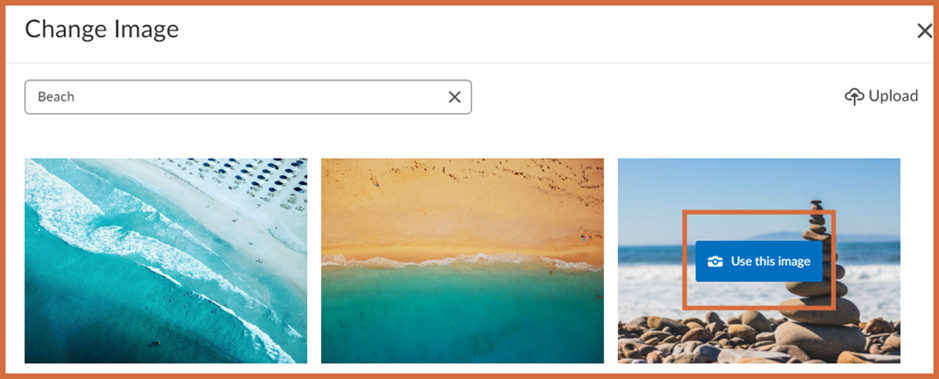
There are two options when choosing your banner. Searching the collection of images Brightspace has to offer or uploading your own image.
To use one of the Brightspace images, enter a search term in the box. Hover over the desired image and click Use this Image.
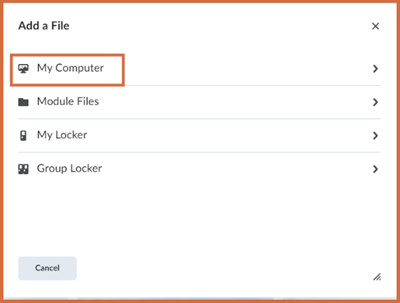
To upload Your own image, select Upload.

Next select My Computer, you can choose an image from your computer by dragging and dropping or browsing your files.
Recommended Size: Ensure the image meets the recommended size of 2400 x 980 pixels for optimal display.
Also ensure that you aren’t breaking any copyright rules before using any images.
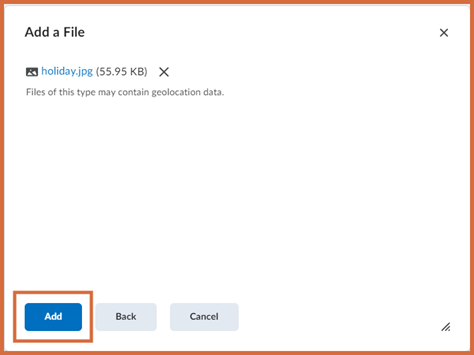
Once your image is uploaded, click the Add button to set your new banner image.
You can find more information on how to customise your module space plus other useful guides by viewing our Brightspace How to Guides on iPark.
Please note: All information is accurate at the time of posting but the Brightspace / Teams layout may have updated.
For more help or information on this tool, check out the iPark website for handy how-to guides; or Brightspace Bytes on Brightspace for helpful screencast tutorials.