Have you tried setting end dates and dismissing announcements from the announcement widget?
Announcements are a way of providing information which alerts students via email (provided students have not switched their email notifications off).
If you use announcements frequently, you will know that announcements within the announcement widget can start taking a lot of space on the module homepage.
There are two ways of removing announcements from the homepage widget (other than just deleting the announcement) – setting end dates which removes the announcement from the homepage widget for all, or dismissing the announcement which removes it only for the individual.
Both of these methods are explained below.
End Dates
There is the option to set an end date so that the announcements are hidden from the widget after a certain length of time, and we recommend you use this on any announcement where the information expires after a certain date.
Once the end date arrives, the announcement will be removed from the home page widget, however the announcement can still be accessed by tutors and module admins from the announcement tool. This does not apply to students.
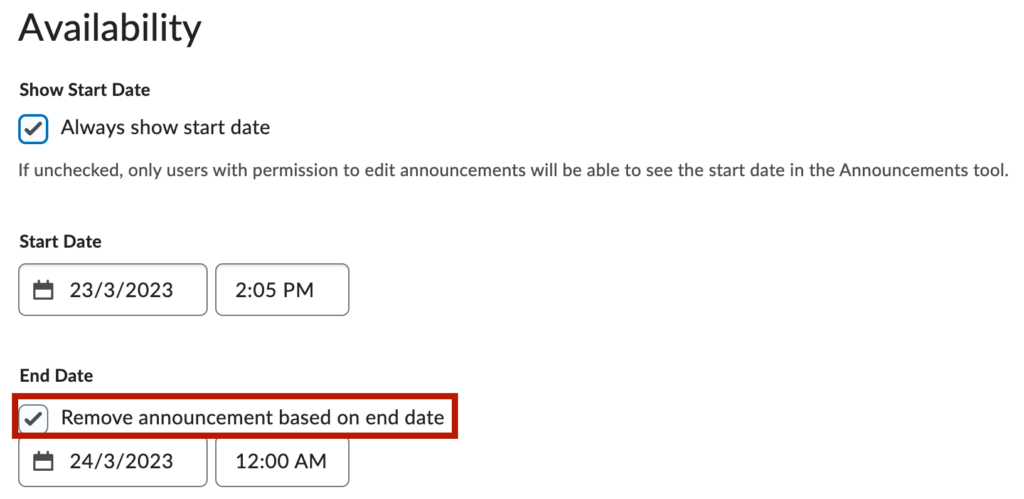
To set an end date; when creating or editing an announcement, go to the Availability heading.
Under the End Date section, tick the Remove announcement based on end date checkbox.
Then use the calendar and time fields to select a time and date.
Dismissing an Announcement
The dismiss tool allows you to hide specific announcements from the announcement widget on the homepage. However, this will only do this for you. All other users on the module will still be able to see the announcement.
The announcement is still available in the Announcement tool, accessed from the Module navigation bar.
Dismissed Announcements can also be put back onto the widget again if required.
To dismiss an announcement, navigate to the Announcement widget on the module homepage.
In the top-right of each announcement, there will be an X icon. Click on this X icon for each announcement that you want to dismiss from the widget.
You will receive a confirmation pop-up at the bottom of the screen saying Dismissed Successfully.

Restoring a Dismissed Announcement
To bring a dismissed announcement back to the widget, navigate to the Announcement page by clicking the Announcements heading on the announcement widget. This will bring up a page showing all the module announcements. Any dismissed announcements will have the word dismissed in brackets next to the title.

Click on the drop-down arrow next to the dismissed announcement title. From the drop-down menu, select the third option called Restore.
You will receive a confirmation pop-up at the bottom of the screen saying Restored Successfully.
Now that you know about dismissing announcements from the announcement widget – why not try it yourself!
Please note: All information is accurate at the time of posting but the Brightspace / Teams layout may have updated.
For more help or information on this tool, check out the iPark website for handy how-to guides; or Brightspace Bytes on Brightspace for helpful screencast tutorials.