The Accessibility Checker tool in Microsoft Word is a built-in feature designed to help users create documents that are more inclusive and accessible. It scans Word documents for potential accessibility issues and provides suggestions and guidance on how to make the document more readable and usable for people with a variety of disabilities, including those who use screen readers, braille displays, or other assistive technologies. The tool identifies problems such as missing alternative text for images, incorrect heading structure, colour contrast issues, and more, and offers recommendations for remedying these issues to improve the document’s overall accessibility. This tool assists authors in adhering to accessibility standards and guidelines, making their documents more welcoming and functional for a broader audience.
Steps to use the Accessibility Checker in Word:
- Access the “Review” Tab:
Navigate to the Review and click on the Check Accessibility button.

- This will open the Accessibility Checker pane on the right-hand side of the document. The Accessibility Checker pane will display a list of potential accessibility issues found in your document.
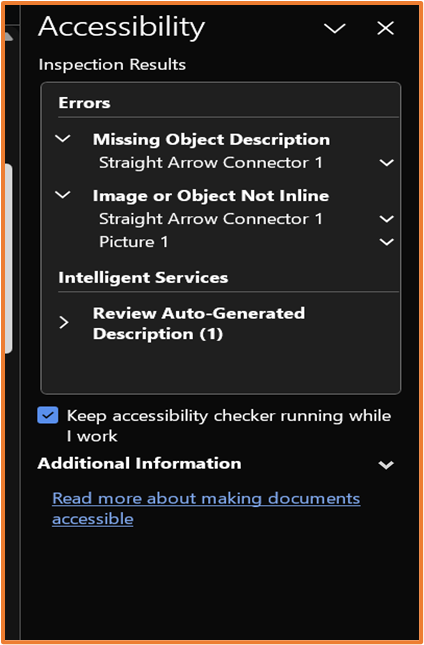
- In the Accessibility Checker pane, you will see a list of issues categorised by error type (e.g., Errors, Warnings, Tips). Click on each issue to view more details.
- For each issue, the Accessibility Checker provides information on what the problem is and how to fix it. It may also offer a How to Fix link for step-by-step guidance.
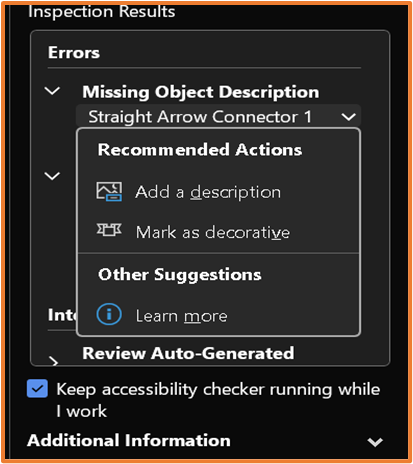
- Address Accessibility Issues:
To address an issue, click on it in the Accessibility Checker pane, and Word will often highlight the problematic content within your document.
Follow the provided instructions to fix the issue. This may involve adding alternative text to images, adjusting the heading structure, improving colour contrast, and so on.
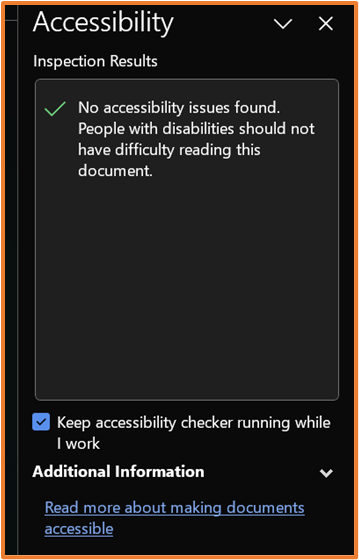
- Recheck Document:
After making the necessary changes to your document, you can re-run the Accessibility Checker to ensure that the issues have been resolved.
By following these steps, you can use the Accessibility Checker in Microsoft Word to create documents that are more inclusive and user-friendly for everyone.
Now that you know about the Accessibility Checker feature– why not try it yourself!
Please note: All information is accurate at the time of posting but the Brightspace / Teams layout may have updated.
For more help or information on this tool, check out the iPark website for handy how-to guides; or Brightspace Bytes on Brightspace for helpful screencast tutorials.